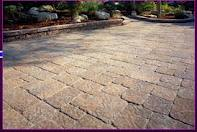
Picture a day where the birds are singing and the day is warm with a slight breeze. Of all days this is literally the perfect day to work outside in the garden or to clean out the  garage. Let’s say perhaps you decide on cleaning out the garage. In preparation for this day of organization, you pull out of the garage and into the driveway your beautifully refurbished 1962 Mustang Convertible. The day goes on and you are able to effectively clear out all the junk from the garage and organize the remainder accordingly. As you are about to congratulate yourself on a job well done, you remember to put the Mustang back in the garage. As you slowly ease your car back in the garage, a horrific irremovable oil stain is revealed. Your brand new paver driveway is destroyed… Or is it?
Chances are that most of us have come into contact with a situation similar to this one – but hopefully not if you have a paver driveway! While we all know that if oil spills on your concrete driveway, well, you better just get used to the “artistic” design, such is not the case for pavers. Pavers are typically held in place by a special type of fine sand that is used to hold the pavers in place (mortarless set pavers).This is very different from what most of us are used to with brick and mortar driveways. While pavers can be held in place by mortar, they are more commonly held in place by sand, which makes paver repairs a whole lot easier.
The sand allows for pavers to be easily replaced should something happen (like an oil spill) or if a paver is cracked. Should you find yourself in a similar situation as denoted above, four simple steps will allow you to remove the scarred paver and replace it easily thus preserving the beauty of your driveway.
First Part: Remove the Problem Paver/s
This part is fairly simple, no matter what the reason, simply remove the problem paver from the walkway, patio or driveway.
Second Part: Put Back the Sand
General rule of thumb, if you take it out, you have to put it back! After successfully completing step one, you are now ready to replace the paver sand base. Traditionally, sand that is coarser works well for the base because of its ability to compact well, thus preventing the sinking of pavers. With this step it is essential to pay close attention to ensure that the sand you are laying down is the same level as the existing sand base, otherwise you will be creating a lovely rise in elevation that will trip your family and friends.
Third Part: Replace the Pavers
This is the fun part; remember when you were young and loved to put together puzzles? The same technique applies here! After you have placed the pavers be sure to check to make sure that they are even with the previously existing pavers, if you need to make some adjustments, a rubber mallet works well to tap pavers into place!
Fourth Part: Sweep in the Sand!
If you have made it to the fourth part, you are almost done! Now it is time to “fill the joints”! Simply sweep the finer type of sand into the joints of the pavers you have just placed. Remember, that base sand is different than grouting sand. After one sweep of sand, pull out your hose and give it a good spray to wet things down a bit. This will serve to compact the sand between the grouts, after the sand has been compacted sweep more sand into the joints –repeat. You get the idea.
