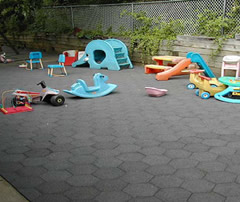
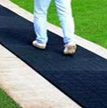
 Rubber pavers have become one of the most popular flooring materials over time. They are popular because of their many quality attributes. Rubber pavers are made out of used tire tread which makes them the most slip resistant flooring materials. Rubber pavers are used on many applications where safety is required like; children’s play grounds, nursing homes, horse barns, patios and public walkways.
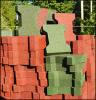
Rubber pavers are made available in many different shapes, colors and they can be interlocked to create many magnificent patterns.
 Rubber pavers offer a long lasting life span and they are low in maintenance. They can be easily installed by yourself or you can hire a professional to get the job done perfect. Rubber pavers can be installed onto a number of existing surfaces like; concrete, stone or wood. This makes their installation process hassle free.
Here Are Some Handy Installation Tips
The first and most important tips for installing rubber pavers are that you keep them free of water. This also applies for any other paver installation. Rubber pavers will contract and absorb the water that they come in contact with. If they do come in contact with water their shape will change and installation may become difficult so it is best to keep them free of water even the slightest amount.
Rubber pavers should be kept free of sunlight as well. The direct sunlight will also cause them to expand which will result in expansion and create gaps upon installation.
Another important tip is when you are deciding on how many rubber pavers you need for this application think carefully and measure the area in square foots. This should give you the right amount of pavers you will need to purchase. If you are not sure on how to do this seek your nearest professional retailers advice.
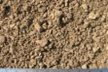 Installation Tip 1: Once you have excavated the site you should prepare a great sub base. This is crucial, crushed stone or aggregate will do the job fine. A great sub base is need for water to evaporate through the joints of the rubber pavers.
Installation Tip 2: Lay the rubber pavers using an adhesive. Especially in the outdoors because of the increasing temperatures, these temperatures can affect the rubber pavers by causing them to move and shift their place.
Installation Tip 3: If you are deciding to paint or do some construction work in the area where your rubber pavers are placed you should cover then as they will absorb any paint or dust which will result in their top texture changes as well as the color. Some if you can try to do this before you have installed the pavers.
Here Are Some Handy Maintenance Tips
The maintenance of rubber pavers is a simple as can be. In they have been installed properly then they will require so little maintenance.
Maintenance Tasks on a Daily Basis
Rubber pavers do not need maintenance on a daily basis. Although you may have lots of children passing over the rubber paved area or even heavy foot traffic which can result in lots of food stains, dirt and grime.
 Tip 1: Generally using a wet mop you should simply wipe over the area. This will remove all food stains and grime. Repeat this step twice and leave to dry and your rubber pavers will be as good as new.
Tip 2: If you find that the pavers are still clean by the end of the next day then do not repeat this process.
Once a Week You Should;
- Use a wet mop and clean the surface of the pavers.
- Check over them to make sure there are no damages or shifting.
- Check for harsh stains which the moping has not removed and purchase a professional solution to remove this stain.
Maintaining Your Rubber Pavers Colors!
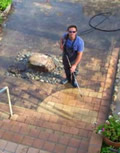 You should at least once a month use a high pressured hose and slowly use it over the surface of the rubber pavers. The high pressured hose will remove anything that lies on the surfaces. It will then bring back the beauties of your rubber pavers.
Now you can enjoy the many benefits of your rubber pavers by using these several handy tips. With an ease in installation and virtually maintenance from what more could you want from a paver!