Limestone Pavers Installation
Following is a quick installation guide to a mortar set Limestone Pavers Installation.
Tools Required
Here is a list of the tools that you will need to carry out your Limestone Pavers installation:
|
|


Plan and Design
It is recommended that you draw out your installation plan on squared paper to scale. This enables you to visualize the installation on paper and make any final changes before starting. Also it is simply best to be organized and be able to measure out how much of each material you will need to purchase.
Prepare Your Site
This step is very important. It will determine the project’s strength and durability. Take your time and do it properly. You must first keep in mind that your Limestone installation should have a fall or slope, to allow water to flow away from the site. This fall is usually 1 inch per 36 inches.
You must test the soil grade of your site. If it is fairly firm soil, then you only need to excavate topsoil to allow for the sand, mortar and Paver thickness. If your soil is quite moist, then you will need to excavate a further 4 inches of topsoil for a base material course, consisting of crushed stone and gravel. This will allow the soil to drain well without collapsing. This could potentially deteriorate the Limestone Pavement. |
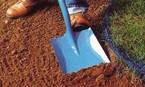 |
Excavate Your Site
Once you have worked out how deep you need to excavate your site, mark out the area with wooden stakes and string, remembering to include the fall or slope. Use a spirit level to measure out your fall of 1 inch for every 36 inches.
Then fill in the area with base material (if required) and the sand sub-base. Remove all stakes and string. Compact the sand with the use of a Tamper. A Tamper can be hired from an equipment rental store.
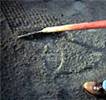
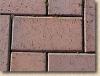
Laying the Limestone Pavers
Start off my mixing up your mortar, to a slightly wet consistency. Only mix in small batches or it may dry out. Slap on a fair amount of mortar, beginning at corner of the site. Place the Limestone Paver on top of the mortar, and tap into the appropriate level with a rubber mallet. As you go along, remember to always keep an eye on the level of the pavers. |
 |
The spacing between the pavers should be about ½ to ¾ inches. This does not have to accurate; just place the trowel between the pavers to get them into position. Once all pavers have been laid and the spacing have been accommodated, you will now have to leave the site to dry for 24 hours. |
 |
Jointing
 |
Jointing should only begin once the mortar has completely dried. Mix up the mortar at a ratio of 5:1. It is best not to make it too wet. You should give it just the right amount of moisture to make it waterproof. Once joints are filled you can either rake them out or use a trowel to create a ridged joint for a more professional look. |
Note: Remember to constantly clean up any spills or dust promptly, otherwise staining may occur.