Slate Tile Pavers Installation Guide
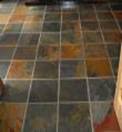
About Slate Tile Pavers Slate tiles and pavers are one of the natural beauties of the world. Slate is a quarried stone which is made up of many natural ingredients. One of the great qualities of slate tile and pavers is that they are just as tough, durable, and hard wearing as solid concrete. Slate tiles and pavers come in many magnificent colors ranging from paver to paver. |
 |
The installation process is quite simple. Even the home handyman will be able to follow simple these simple guidelines.
STEP 1: Preparing the surface
Before installing the slate tile pavers it is advised that the area must be cleaned. If the base is timber flooring which has been polished you will need to sand back the area to give it a rough feel. (Slate tile pavers cannot be laid directly onto sand. They should be laid out on soil or a mortar bed. Plywood can also be used as a base for slate tile pavers)
STEP 2: Spreading the mortar
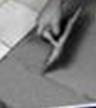 |
Start spreading the mortar in small sections where you will be starting to lay out your slate tile pavers. (The prepared base must be rough, as you will achieve a greater bond.) Helpful hint: If you are installing slate tile pavers in the indoors as your flooring try to start at the other end of the exit. This ensures an easy exit without destroying your paving area. It also ensures easier access. |
STEP 3: Laying the slate tile pavers
| Once the mortar is being spread out through small areas you can then start laying out the slate tile pavers in your chosen pattern. If you have chosen to use grey slate with a common pattern lay the pavers side by side. If you are after a gap between the two then use joints between them. If you are not after a gap then just place them side by side without a joint. |  |
Helpful Hint: If you have chosen colored slate lay them in running random colors. No two slate tile pavers will run the same in color. So it would be pointless trying to match them together.
STEP 4: Cutting the pavers to the right size
 |
When you start to reach corners and ends of walls you may need to cut the slate tile pavers, as they are too big. Slate can be easily cut with a masonry saw. It is quite simple. Mark out where the slate needs to be cut. Helpful Hint: It may be easier to cut all edges once you have done the main areas. It will save you a whole lot of time. |
STEP 5: Securing the slate
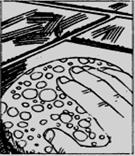
Make sure the slate tile pavers are secured and firmly placed against the mortar bed. Placing a firm hand over the slate once it has been laid can do this.
STEP 6: Drying time and Grouting
The newly paved area should be left to set and dry for at least 24 hours. After the 24 hours is up you may then begin to grout the joints if you have chosen that particular design.
Remove all the paver joints and begin to apply the grout. Making sure all joints are filled and all mixture is removed from the slate tile pavers with water. The grout should then be let to dry for a further 48 hours before you allow any foot traffic.
STEP 7: Cleaning and Sealing
After the 48 hours has past warm water can be used to clean the surface using a mop.
A sealing agent can then be placed over the area. Sealing agents ensure that the slate tile pavers will with hold their natural beauty. Sealers usually give a shiny finish. But sealing does not have to be done. The choice is purely yours.
Maintaining Your Slate
The maintenance is very simple. All that is needed is a wipe over with warm soapy water once a week. If you have chosen to seal your slate sealing may be needed every 3 months especially in cases where a high gloss has been used. Waxing your slate is also another option. The only problem with waxing is it strips the slate of its natural beauty such as it color and texture. The grout that is found between the joins will also go off color. But waxing will protect the slate from damages such as scratches. |
 |
NOTE: Seek professional advice before deciding on what is best for your flooring needs when it comes to sealants and waxing.